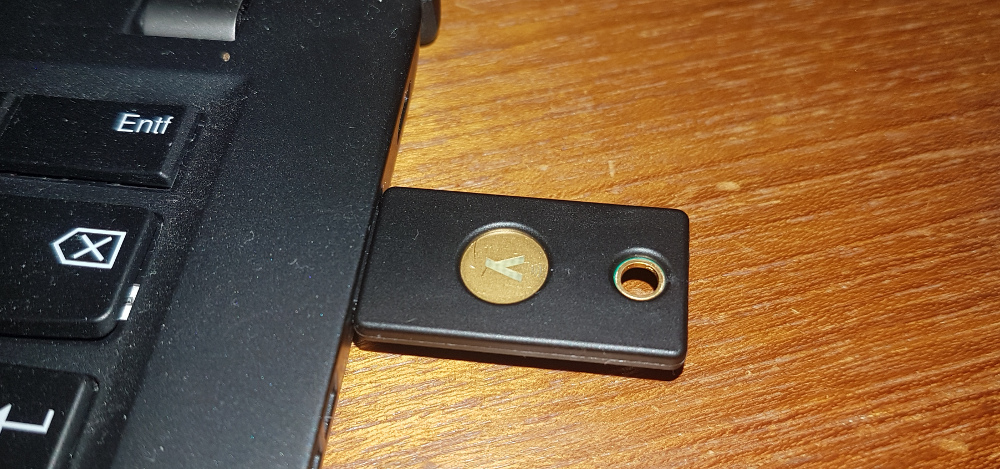
In this blog post we will show, how you can enroll a Yubikey as a PIV smartcard. privacyIDEA will issue the certificate request sent by the Yubikey but at the same time require an attestation certificate. This way privacyIDEA will assure, that the key pair indeed has been generated on the smartcard.

You could then use the Yubikey with the x509 certificate to login to you desktop, sign or decrypt emails. These application examples are not topic of this blog post and might be covered in later posts.
You will need a Yubikey 5 and a privacyIDEA installation with version 3.5. We also assume in this example, that you are running Linux on your desktop.
Setup CA in privacyIDEA
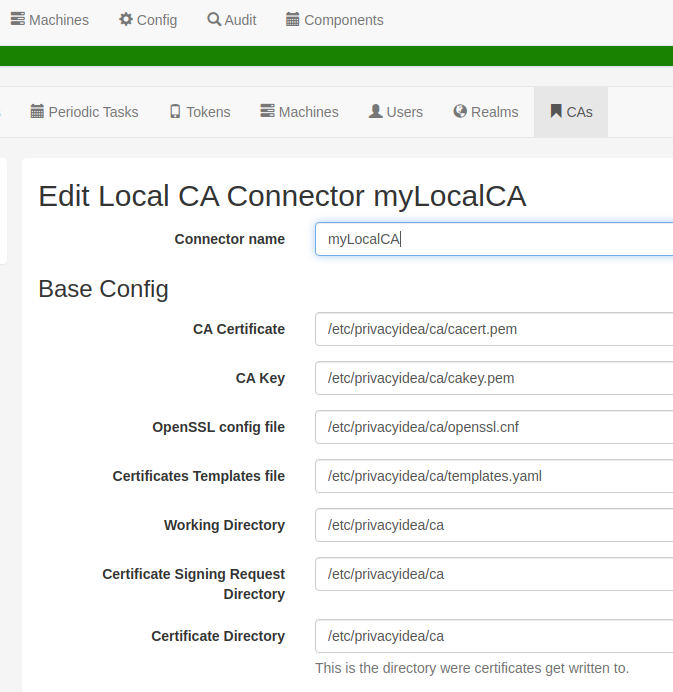
First we have to setup a certificate authority (CA), that will sign the certificate signing request (CSR) generated by the Yubikey. privacyIDEA currently only supports local openssl based CAs. This could however be a sub CA to your existing enterprise CA. In this example, we create a new root CA.
Note: You need read access to pi.cfg and write access to /etc/privacyidea/ca
# pi-manage ca create -t local myLocalCAThis pi-manage command will create the CA files and also the CA configuration within privacyIDEA. You are asked a couple of questions and answer them accordingly:
# pi-manage  ca create -t local  myLocalCA

             _                    _______  _______
   ___  ____(_)  _____ _______ __/  _/ _ \/ __/ _ |
  / _ \/ __/ / |/ / _ `/ __/ // // // // / _// __ |
 / .__/_/ /_/|___/\_,_/\__/\_, /___/____/___/_/ |_|
/_/                       /___/

Creating CA connector of type local.
In which directory do you want to create the CA [./ca]: /etc/privacyidea/ca
What should be the keysize of the CA (2048/4096/8192)[4096]:
How many days should the CA be valid [1800]:
What is the DN of the CA [/CN=myLocalCA]:
How many days should the CRL be valid [30]:
What should be the overlap period of the CRL in days [5]:
============================================================

        Directory  : /etc/privacyidea/ca
        CA DN      : /CN=myLocalCA
        CA Keysize : 4096
        CA Validity: 1800

        Validity of issued certificates: 365

        CRL validity: 30
        CRL overlap : 5

Is this configuration correct? [y/n] y
You also need to fix the access to the directory
chown privacyidea -R /etc/privacyidea/caand create a file /etc/privacyidea/ca/templates.yaml with the contents:
user:
    extenstions: "user"
    days: 365
which will ensure, that the certificate will created as a user certificate with a validity period of 365 days.
You need to do some minor fixtues:
cd /etc/privacyidea/ca
openssl rand -writerand .rnd
touch index.txt.attr
chown privacyidea .rnd index.txt.attr
For simplicity comment out two lines (crlDistributionPoints and authorityInformationAccess) in the section “user” in the file /etc/privacyidea/ca/openssl.cnf
[ user ]
keyUsage = nonRepudiation, digitalSignature, keyEncipherment
basicConstraints = CA:FALSE
subjectKeyIdentifier=hash
authorityKeyIdentifier=keyid,issuer:always
#crlDistributionPoints = @crl_dp_policy
#authorityInfoAccess = caIssuers;URI:http://www.example.com/yourCA.crt
As a last step, go to the Web UI in Config->CA and add the “Certificate template file” /etc/privacyidea/ca/templates.yaml.

Now your CA is ready to go.
Setup PIV trusted certificates
The attestation certificate verifies that the private key was generated on the Yubikey. You can tell privacyIDEA, which attestation certificates should be trusted. Here we will use the Yubikey, so we need to fetch the Yubico PIV CA from their web site.
mkdir /etc/privacyidea/attestation
wget https://developers.yubico.com/PIV/Introduction/piv-attestation-ca.pem \
     -O /etc/privacyidea/attestation/yubico.pem
The PIV Root CA has signed the attestation CA, that is contained on each Yubikey. We need to retrieve this from the Yubikey. Do do so insert a Yubikey and run the following command:
yubico-piv-tool --action=read-certificate \
      --slot=f9 >> /etc/privacyidea/attestation/yubico.pem
The certificate we read from the Yubikey from slot f9 is the attestation CA, that was signed by the Yubico CA. The attestation CA will sign the attestation certificate, that testifies, that the CSR was created on the yubikey. The file yubico.pem now contains the certificate chain of the PIV Root CA and the Attestation CA.
Note: With new production charges Yubico might put a new attestation CA on the yubikeys. So if you buy 100 yubikeys, they will most probably have the same attestation CA, but if you buy another 100 yubikeys several month later, they might have another attestation CA, so you need to repeat this step and put the new certificate chain in a second file.
Configure privacyIDEA policies
privacyIDEA can already enroll x509 certificates. But to ensure, that it will only enroll certificates from CSRs, that are created on the Yubikey, we need to define a new policy, which is available starting with privacyIDEA 3.5.
We create a policy to require an attestation certificate
scope: enrollment
action: certificate_require_attestation=require_and_verify
In this example we will have the administrator enroll yubikeys, so we set an admin policy, that specifies, where the trusted CA chains can be found:
scope: admin
action: certificate_trusted_Attestation_CA_path=/etc/privacyidea/attestation/
Enroll certificate
Now the admin needs to pass the CSR and in addition an attestation certificate, if he wants to have the CSR signed and receive a certificate. The admin could do this manually with the yubico own tools and using the privacyIDEA REST API.
However, in this example we use the privacyidea admin client, which can be found at github.
Note: You can run the command line client on any other computer, it does not need to be your privacyIDEA server.
In this case we are running it on an Ubuntu Linux desktop.
Prepare dependencies:
sudo apt-add-repository ppa:yubico/stable
sudo apt update
sudo apt install yubikey-manager
sudo apt install ykcs11
Create a virtualenv:
virtualenv -p /usr/bin/python3 piv-testEnter the environment:
source piv-test/bin/activateInstall the privacyidea admin client:
git clone https://github.com/privacyidea/privacyideaadm
cd privacyideaadm
pip install .
Now you can use the current development branch of the admin client in your virtualenv.
Note: You need to have enough hardware access rights, otherwise you might get errors like ” Failed to transmit with protocol T1. Reader is unavailable”
If necessary, you can reset the PIV data on your yubikey:
ykman piv resetNow you can enroll the yubikey certificate:
privacyidea-enroll-yubikey-piv init-cert -s cornelius -u cornelius \
     -U https://localhost -a super -p test -c myLocalCA -n -P 123456
This will create a CSR on the Yubikey, with the subject “CN=cornelius” and access the Yubikey with the PIN “123456”. The CSR and the attestation certificate will be sent to privacyIDEA at “https://localhost”, the admin will authenticate as user “super” with the password “test” and enroll the certificate to the user “cornelius”. privacyIDEA will verify the attestation certificate, sign the CSR and the certificate will be imported to the Yubikey.
Note: If you have problems enrolling and try to reenroll, you might need to delete temporary files _*.
You can now use the Yubikey with the certificate on it to sign emails or login to your Desktop. As mentioned, this can be a topic for future blog posts.
Conclusion
We showed here how an administrator can enroll a Yubikey with an x509 certificate to a user. At the same time privacyIDEA ensures, that the private key is really generated on the Yubikey. This is an important aspect, when using smartcards for authentication. This ensures, that the private key is unique and can not be copied, neither during the enrollment process nor lateron, making the smartcard a unique authentication factor.
The same way, a user could issue a CSR that was generated on a smartcard to privacyIDEA, making the enrollment process more robust.
This is an important fist step for privacyIDEA to deal with smartcards. We will continue working on smartcard functionalities, smoothening the workflow and enhancing policies.
In an enterprise environment managing x509 certificates and smartcards on a central location is crucial. The Yubikey could contain several certificates. It can contain Webauthn profiles or HOTP slots. If a Yubikey is lost, the service desk should be able to revoke the one hardware key and the central management should know, which certificates and which HOTP slots are affected. With privacyIDEA we are working on this, to ease the life of administrators and service desk users.


Start the discussion at community.privacyidea.org